Wednesday, 8 June 2016

Melipat baju

Bagi kebanyakan pencetak, selain kepenatan semasa mencetak baju, proses melipat baju juga adalah salah satu kerja yang meletihkan. terutama sekali bahagian pinggang. Ada alatan yang dapat memudahkan serta mempercepatkan proses melipat ni. salah satunya seperti gambar dibawah
Kelebihan menggunakan alatan ialah ia dapat memberikan lipatan yang sama saiz. Tetapi bagi kami, ia agak
melecehkan serta melambatkan. Jalan terbaik kami adalah dengan melipat secara manual. Lagi mudah. :)


Jom Tempah Tshirt. whatsapp 0127974020 / 0106612733.

SIMULATED 5 WARNA

Teknik Pecahan warna

Dalam dunia silkscreen, teknik untuk mendapatkan  full warna ialah dengan menggunakan teknik pecahan warna atau cmyk. Dimana warna diasingkan dan dibuat dalam halftone. Untuk gambar dibawah, ia menggunakan 5 warna untuk mendapatkan hasil yang cantik. Jom layan gambar.


Untuk teknik simulated ini, kena lah pandai membancuh ink bagi mendapatkan output yang sama dengan 
artwork yang dibuat. Susah nak terangkan dalam ni. Team kami pun masih lagi dalam proses pembelajaran untuk mendapatkan output yang baik dan cantik

jika korang ada pertanyaan atau nak tempah tshirt boleh lah terus whatsapp 0127974020

sekian, salam ramadhan

Tuesday, 7 June 2016

Salam Ramadhan

Kami dari team m&n creative masih belum terlambat untuk mengucap selamat berpuasa bagi yang beragama islam. Production kami berjalan seperti biasa. Kepada yang ingin menempah baju berkumpulan sempena syawal yang akan tiba tidak lama lagi, boleh terus berbincang melalui whatsapp 0127974020.

 Jangan terlambat..!!!!


* JOM tingkatkan kualiti amalan WAJIB kita...

Monday, 23 May 2016

T-shirt Kumpulan Motor


Assalamualaikum. Sudah lama admin tak update atau post gambar tshirt. Ok kali ini tempahan datang dari group motor dari kota tinggi. Cetakan menggunakan plastisol. Yang pasti hasilnya berkilat. Jom layan gambar.


Harga yang kami berikan masih lagi mampu milik. Kepada yang ingin menempah tshirt. Boleh terus hubungi atau whatsapp kami di 012-7974020 / 010-6612733. Kami akan layan anda 24 jam sehari. Terima kasih. :)

Tuesday, 4 August 2015


TSHIRT BRANNBOLL STYLE
=================
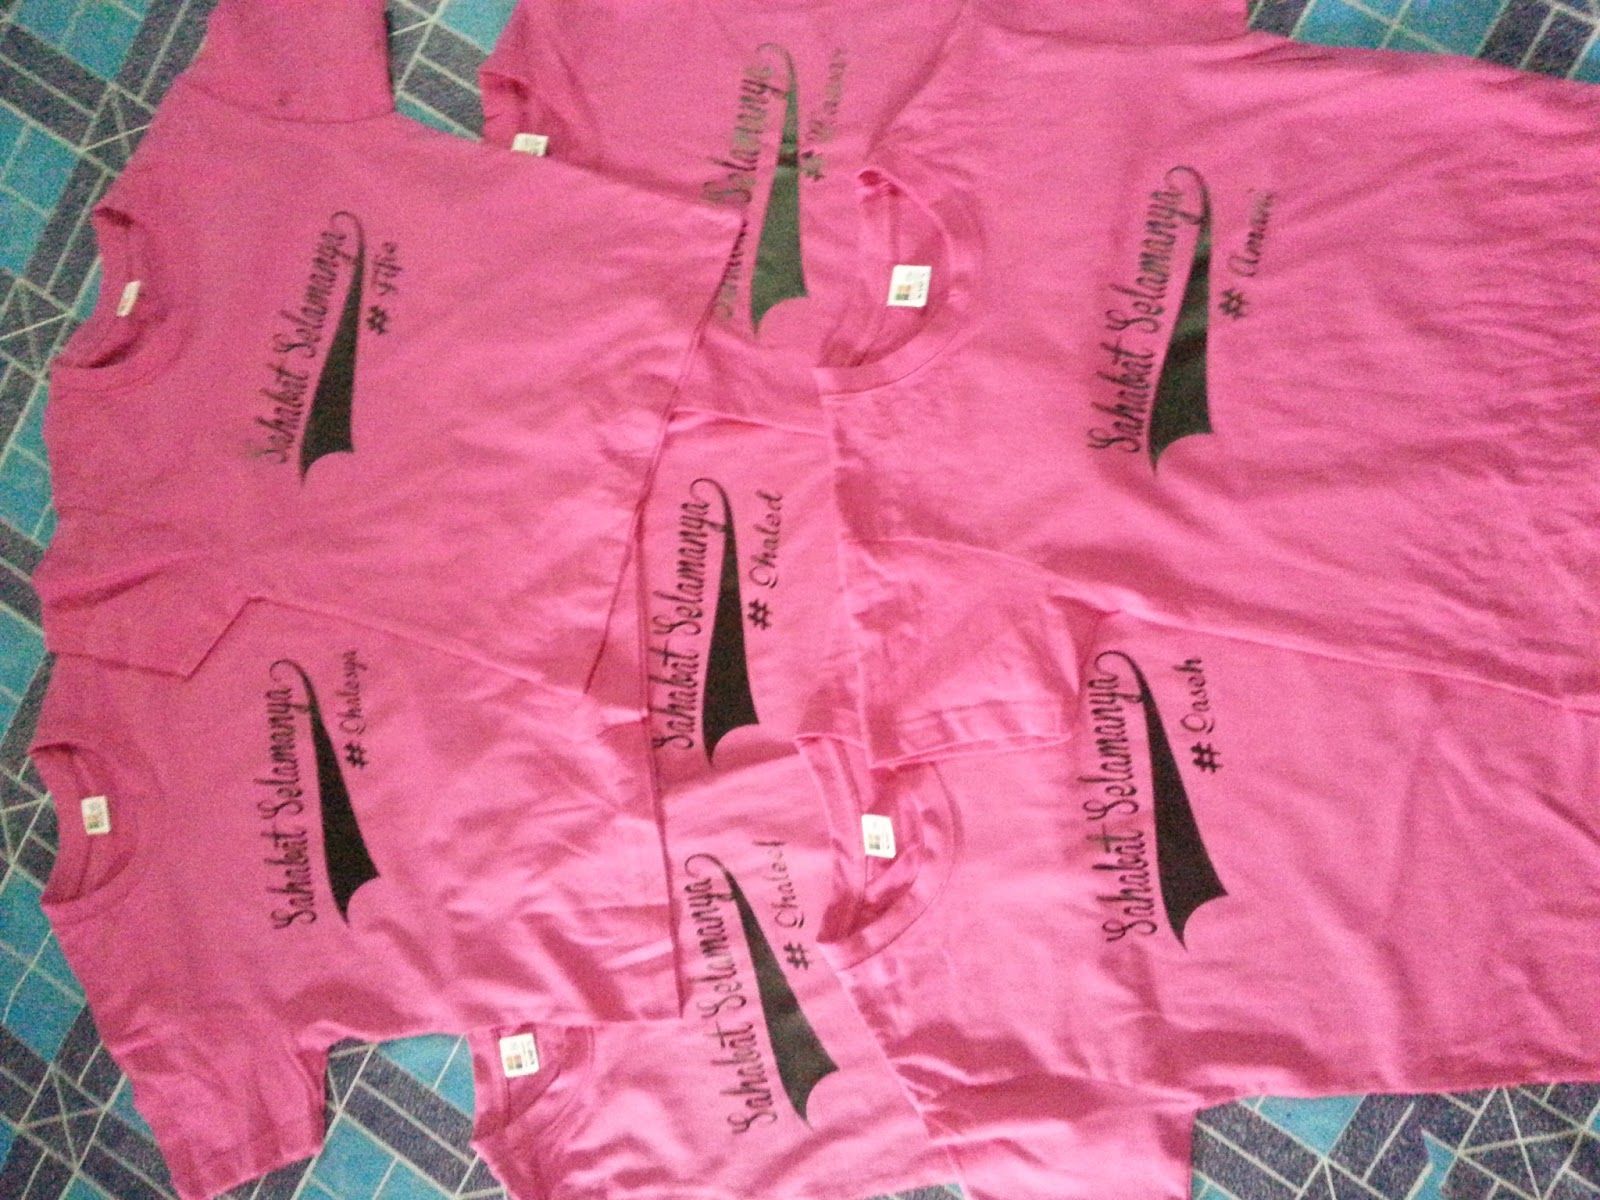
Tshirt yang menggunakan font brannboll. Nama individu pula diletakkan pada setiap baju. Ia sangat menarik untuk dipakai secara berkumpulan. Pelanggan kami amat berpuas hati dengan servis daripada kami.

Anda mahu mencubanya.???


sms/call/ whatsapp 0127974020 / 011-12134271 untuk menempah. Sangat sesuai dipakai untuk sebarang aktiviti.. :)


Sunday, 2 August 2015

Baju SMK(P) Sultan Ibrahim
=====================
Tempahan dari sekolah smk(P) Sultan ibrahim sebanyak 27 pcs.
Hasil yang sangat berkualiti

           >> Ia dicetak menggunakan plastisol
           >> Finishing heatpress untuk menghasilkan gambar yg berkualiti
           >>  Siap dalam masa 5 hari

Jom layan gambar...


Kepada yang berminat untuk menempah seperti, segera call/ sms/ whatsapp 0127974020/ 011-12134271.
Kami menawarkan print tshirt serendah RM10. tq

Sunday, 26 July 2015

PRINTING BANNER

Selain daripada printing tshirt, kami juga ada menyediakan perkhidmatan printing banner. 
Harga bermula daripada RM3/ kaki persegi. Tiada minimum order.


Untuk sebarang pertanyaan, call/sms/whatsapp 0127974020 / 011-12134271. tq

Tuesday, 21 July 2015

TSHIRT V100 PONTIAN

Tempahan dari kumpulan V100 pontian. Dicetak menggunakan plastisol  + Finishing. Berminat nak buat tshirt seperti ini: 
whatsapp 0127974020/ 011-12134271.


*Sesuai kepada mereka yang akan berkonvoi pada 31 0gos ini. Jom tempah sekarang. Pastikan konvoi merdeka anda memakai baju yang RARE.

BAJU BRANNBOLL

Kali ini nak share job brannboll style. Nama pada baju menggunakan font brannbol. Cantikkan.!!
Ia dicetak menggunakan Vynil yang berkualiti. Dijamin anda berpuashati.


Berminat whatsapp segera 0127974020/ 011-12134271. Jom Print Tshirt.

Monday, 20 July 2015

Salam Lebaran M&N Creative

Tidak terlambat untuk kami dari warga m&n Creative mengucapkan 'SELAMAT HARI RAYA, MAAF ZAHIR & BATIN' kepada followers serta pelanggan2 kami. Kedai kami  mula beroperasi pada 22 julai 2015. Kepada yang ingin menempah secara online,
 WHATSAPP :  0127974020/ 011-12134271. 

* ALAMAT M&N CREATIVE : NO.20-1, JALAN DELIMA,  PUSAT PERDAGANGAN PONTIAN, 82000 PONTIAN JOHOR. JOM TEMPAH TSHIRT

Saturday, 4 July 2015

BAJU REWANG

Salam. Kepada bakal pengantin yang sedang mencari design baju rewang. 
Kami ada menyediakan beberapa design Baju rewang. 
== = = = = = = = = = = = = = ==
Promosi Raya : Tempah baju rewang(50pcs) + free button badge.
Harga : Bermula daripada Rm10.


Berminat? Segera whatsapp kami 012-7974020/ 011-12134271. 
*Promosi sah sehingga syawal @ 20 pelanggan terawal. :)

Wednesday, 18 February 2015

I AM.... Cara mudah untuk memastikan org mengenali anda adalah dengan memakai baju I AM. Jom tempah selagi musim belum tamat

Kuantiti : 2014 hingga 2015 >10k pcs
Harga : RM20/pcs


SMS/CALL/Whatsapp 0127974020. I AM M&N CREATIVE


Tuesday, 17 February 2015

Post Kali ini berkaitan dengan 'mug'. Sesuai untuk dijadikan hadiah atau 'doorgift' untuk sesuatu majlis. Pastinya harga yang kami tawarkan adalah berpatutan.

Teknik : Heat Transfer
Price : RM10/pcs
kuantiti : 20pcs


Jika berminat boleh sms/call/whatsapp 012 7974020 (zam). 'Drink ur tea'.


Friday, 13 February 2015


Assalamualaikum. Sudah lama admin tidak post pada blog ini akibat beberapa masalah teknikal. Ok, Kali ni post berkaitan tshirt COC KING BARBARIAN yang ditempah oleh pelanggan. Ia dicetak secara kaedah silkscreen CMYK. 

Teknik: Silkscreen
Price : Rm35
Qty yg ditempah : 20pcs


Ingin menempah dengan kami. Jangan segan silu. Boleh Like FB page M&N Creative. Berminat untuk menempah sms/call/whatsapp 0127974020. 'JOM WAR'


Thursday, 10 May 2012

Tshirt Kelas RK1


Salam malam jumaat. Ok,  Kali ni post mengenai baju kelas RK 1. Pict agak blur di sebabkan kamera yg agak murah.. hehe. ape pon thanks to customer. jom layan gambar baju.


Sekian saja untuk post kali ni. Insyallah, rezeki itu dtg nye dari Allah S.W.T. semoga kita diberkati oleh Nya. Jika anda ada pertanyaan just call  0127974020 (zam). Trust our Brand.


Saturday, 10 March 2012

CannibeaT

salam malam. Post kali mengenai baju cannibeat. Design yg simple& mudah di print atas baju.
So, jom layan picture nye dulu


Simple & smart. So sesiapa nk order tshrt, just hit me by mesej or call trus. 0127974020 (ZAM).
Trust our Brand. TQVM

Salam semua. setelah skian lama blog ni x di update akibat masalh teknikal. Sorry for waiting so long.
Now, the new year is begin. Lets Print.. yeahh..


Monday, 22 August 2011

Imtiyaz

Salam kemBali. Sebelum  memulakan kata2, meja printing ku sudah tidak berupaya lgi utk menanggung baju-baju. Skrg ni Tgh memikirkan meja printig yg ssuai~. ok, kali ni ak dpt job dripada kelas 5 imtiyaz. Kuantiti sebanyak 18 helai. Trial for my printing. Jika mereka berpuas hati, akan ada susulan tempahan yang akan di lakukan. Jom layan Gambar.


                                                                  Underbase putih

2nd Layer underbase

Baju yg Telah siap

                                                              Selepas baju di seterika


Akibat meja printing patah, job ni terpaksa di postpone selama 2 minggu. aishh, ape pn rezeki itu dtg dripada Allah S.W.T. Trust Our Brand. Tinggalkn komen or just email zame_il@yahoo.com jika ada keraguan. TQVM

Sunday, 21 August 2011

Baju Love


Salam Ramadhan. Dah lama xpost kt blog ni coz intrnt ada problm. Job latest ni dtg nye dri sahabat ku sndri.
Total cuma 8 helai tp agk leceh jugak sbb byk colour yg kna guna. Ape2 pon korng tgk ler pict kt bwh 2.
Nice..


 underbase Putih

hampir siap

fully colour

Sebenarnya meja cetak ni sudah uzur. So nanti kan kemunculan  meja Printing dri 'Silk Screen Style'. Anyway kalau nk dptkn information just call or email zame_il@yahoo.com. Trust our brand. Tqvm


Tuesday, 2 August 2011

Tutorial CMYK


Salam Ramadahn. Hari ni msuk hari ke dua Ramadhan. Hope korng xda lubang2 dalam menjalankan ibdah puasa ni. OK, kali ni ak nk post tentang tutorial mengenai CMYK. So interesting. Try la kalo nk tau..

1.) We are going to start off by firing up Adobe Photoshop CS2, and open the registration.psd.
Alternatively, if you would like to start from scratch, create a new file. This file will be 8.5” x 11” at a resolution of 600dpi in the CMYK color mode. Click OK and lets get started.
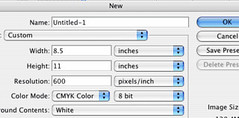
Creating a new file
2.) Next, place the artwork that you plan to use for the final screen print into the registration.psd. File > Place. We are going to want the largest image possible in terms of resolution in order to get the best quality out of our printed piece.
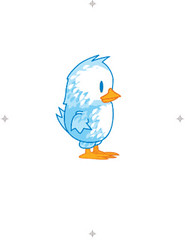
Placing the artwork
3.) I am choosing a vector image, and while I would have better results going with maybe 5 color spot print, this will work fine for what we are doing. Also, being a vector image, I have the freedom to scale this as large as I like for our final screen.
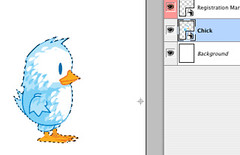
4.) Because I eventually plan to print this onto a colored shirt, I will need to create a white spot plate. I am going to CMD+click (or ctrl+click for PC) on my Chick layer, to create a selection of the artwork, and on a new layer fill that selection with white by pressing CMD+Delete (or ctrl+backspace on a PC).
Selecting the artwork
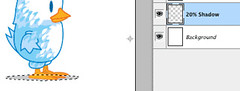
5.) I am also going to create a quick drop shadow for my little chick. Because I want to print this drop shadow right onto the shirt, creating just a dark spot beneath the chick, I do not need to have a white background. So, I will create a new layer under my white spot layer, and with the circle marquee, create a small, horizontal oval. I am going to fill this with 20% black.
Creating a simple drop shadow
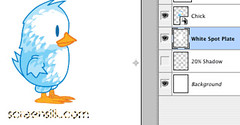
6.) I am also going to quickly add some text to my design. Using the text tool, I am going to quickly add screensilk.com in century gothic under my chick. I hit the color box at the top, and using the eyedropper sample the orange from my chick to be used with the text.
7.) Again, because I am going to want this text to be very visible, I am going to have to add it to my white spot plate. Again, I CMD+click (ctrl+click) the text layer to create my selection and after selecting the white spot plate layer, I hit CMD+delete (ctrl+backspace) to fill it with white.
Adding text
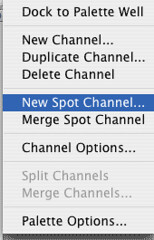
8.) To make this process as easy as possible, lets quickly make our white spot into its own plate. To do this, we are going to , once again, CMD+click our white spot layer. With our outline selected, open the channels palette and from the flyout menu select “New Spot Channel”. Selecting this creates a new channels layer that includes our white spot as a plate. This will be helpful when we start making our separations in the next step.
Creating a new spot color channel
9.) Save your file.
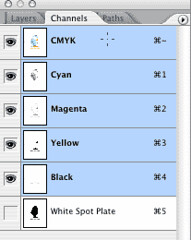
10.) Let’s start creating our separations. Quickly clicking through our channels palette, we can see how our original artwork is being broken into 5 channels of color. Each channel contains a certain percentage of color to create the colors in the final artwork. Our goal is to break out each separation and convert it to a screen printable halftone.
Our CMYK channels
11.) At the top, select Layer >Flatten Image
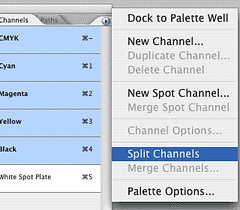
12.) Yikes! I know, I hate doing that too, but looking at our channels palette, you can see that all of our channels are still intact. Open the flyout menu on the channels palette and select Split Channels. This is going to close our flattened file and create 5 individual files of each color separation.
Splitting the channels
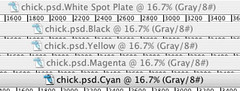
13.) Ok, so now we have our 5 plates. Why 5 you ask? Well because even though we are doing 4 color printing, we do have our white spot plate. If we are only printing to white shirts, we won’t need that plate, but it is easier to create that plate now, than realize a few days later that you want to go to colored fabric and you need to go back and create it. Each file open is named after the original file and has the color name appended to the filename.
Our outputted separations
14.) Now for the easy part. We are going to convert each of these files to a black and white halftone. From the menu bar, select Image>Mode>Bitmap.

15.)
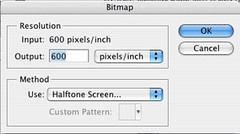
Now we are presented with the bitmap window. Since we are going to output our artwork at the same resolution as we created it, we will put 600 pixels/inch in the output box. For our screening method, we are going to use a halftone, so select Halftone Screen from the drop down box. Click OK
Bitmap Dialog Box
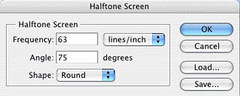
16.) Next we are presented with our halftone screen settings. If you read my previously mentioned article, most of these options should suddenly make a lot of sense to you. The frequency is our LPI. In the article we discussed the means of figuring out your optimal LPI for your screen. For my screen with a mesh count of 220, I figured out I should use an LPI of 63. So in the frequency box, I put 63 lines/inch.
17.) In the article I also discussed halftone angles and their importance for quality prints. Here are the angles I had recommended:
• cyan = 75°
• magenta = 15°
• yellow = 105°
• black = 45°
18.) Because we are creating our Cyan plate, I am going to put 75 into my angle box. For shape, we are going to go with the round halftone.
Halftone Dialog Box
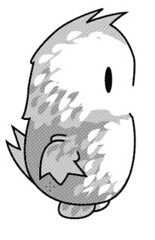
19.) Click Ok, and our plate is converted to a print ready halftone separation.
Final Halftone 100%
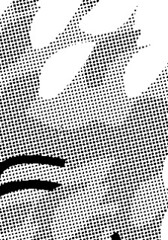
Close up of halftone separation
Repeat these steps with the other 3 separations and you will have print ready files ready for output to transparencies or film.
The final print:
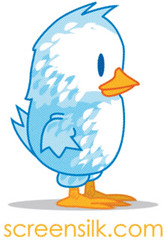
The final separations printed
Close-up of the final print:
Final Closeup
Creating full color screen printed designs can be a rewarding (and profitable) experience. The key to success will be to experiment, and finding the right balance between detail and printability.

So interesting. Kalo korng dah bca artikel ni, so try la buat, jdi ke tak. hehe.